.jpg?ph=3cb910822d)
REVERSE GLASS PAINTING
What exactly IS reverse glass painting? Does is really mean you paint in reverse?! Oh come on now, whose idea was this? :o)
Let’s start with the obvious first challenge. You know, the painting on glass challenge… the part where the surface is glossy and non-porous. Well, it may be a bit tricky to paint on glass but we’ve simplified it all for you. As a matter of fact, here’s a link to the basics of glass painting.
As for reverse glass painting, the second challenge of course, is that you really DO have to paint in reverse. You’re actually painting behind the glass. So then, the order that you paint in has to really be thought through.
What’s interesting too is the history of reverse glass painting. It actually dates back to ancient times, possibly before the 4th century A.D. This form of painting was often done in miniature. The main subject of interest was depictions of religious figures. It became widely fashionable in Italy during the Renaissance period.
 Reverse painting on glass is an extensive art form that requires time and patience to master. However, for decorative painting purposes, we are discussing a much more simplified version; one that you can master within a few short strokes.
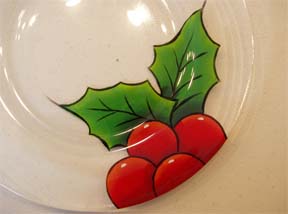
An excellent way of trying out reverse painting on glass is to do it on inexpensive clear glass plates. These plates make a beautiful addition to any table setting and can be coordinated to your existing décor.
As mentioned earlier, because glass plates are viewed from the front, but painted on the back, a bit of thought needs to go into the painting process. Typically, the details are painted first, followed by any tints, highlights and shading. Then the middle value (usually your basecoat) being done last; that is, the design is painted in reverse order … a little tricky maybe … but fun to do.
Well, the only thing better than words is pictures. Follow along while we show you how to paint this free glass painting pattern. You may want to paint a bunch to give as gifts!
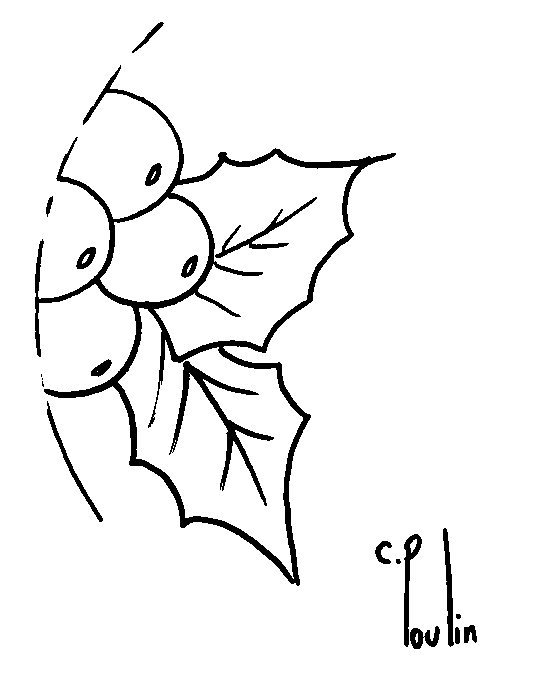
HOLLY and BERRIES PLATE
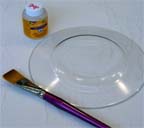
Supplies:
6” clear glass plate
Delta Permenamel Surface Conditioner
Delta Permenamel Thinner
Delta Permenamel Paints in:
Ultra Black
Ultra White
True Green
Hunter Green
Limeade
Red/Red
Tangerine
Lt. Burgundy
Delta Permenamel Clear Gloss Glaze
If you’ve never used the Permenamel Paints by Delta, we highly recommend you go to our Glass Paints Page.
Brushes:
#10 flat brushes (two if you have them)
#1 script liner
 A) Wash the plate(s) then rinse with vinegar and water (1:1). Dry well.
Remember not to use water with this paint. Paint is thinned or cleaned using thinner. It is possible to wash out the brush between colors. However, please make sure you blot the water completely from the brush.
B) Apply a coat of Surface Conditioner to the back of each plate. This usually dries within minutes. The conditioner allows the paint to adhere to the surface. It must be re-applied after 4 hours, if you don’t get to paint the plates within that time.
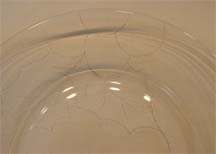 C) Trace the tracing on to the front of the plate. Slide black graphite or white graphite between the tracing and the plate. Using a stylus and even pressure transfer the line drawing to the plate. Now you’re all set!
 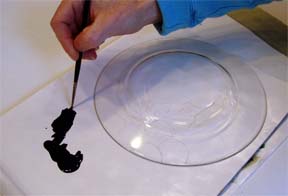 1st step - Reverse Glass Painting - Outlining
You must thin the paint slightly for outlining the design. Use a bit of thinner mixed with Ultra Black and your liner. A good tip is to stand over the project so you can look straight down.
 Using your pattern as a guide, carefully outline all of the design lines, including the veins on leaves (omit the highlight dashes). Let dry completely.
 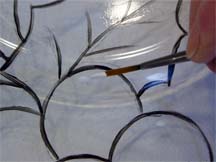 2nd step – Highlight dashes
Clean liner and load with a bit of Ultra White. You actuall put the highlight on first when you're doing reverse glass painting!! Paint a highlight dash on the highlight side of each berry. Let dry.
 It can be a bit of a challenge to get a smooth float with these paints, so an alternative is to double load your brush.
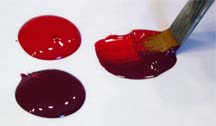
 3rd step – Reverse Glass Painting - Shading
Berries - Double load #10 Flat with Lt. Burgundy and Red/Red. With Burgundy along the bottom side, stroke paint on each berry. While waiting for it to dry, you can do the leaves. Repeat when dry.
Leaves - Double load #10 Flat with Hunter Green and True Green. Stroke each leaf with Hunter Green positioned next to the berries. Watch brush position. Pick up more paint and blend as needed. Repeat when dry.
It helps to wait at least 45 minutes to 1 hour between coats to make sure each layer is properly dry. Otherwise, the paint can lift off.
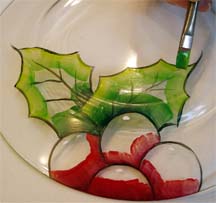 4th step - Reverse Glass Painting - Highlighting
Berries – Double-load the #10 Flat with Tangerine and Red/Red. With Tangerine positioned towards outside edge, use a C-shaped stroke to apply paint. While waiting, you can paint the leaves. Repeat when dry.
Leaves – Double load #10 Flat with Limeade and True Green. With Limeade positioned towards outside edges, stroke highlight onto leaves. Repeat when dry.
5th step - Fill in both leaves with True Green on a #10 Flat. Fill in the berries with Red/Red on #10 Flat. Let dry. This may need to be repeated, if you can still see through the paint.